Friday, March 25, 2011

Step By Step Process To Create Physical Standby Database Using RMAN


Hi,
I got many mails to post some steps for implementing the Standby Database in a real time environment.This exercise I have completed few years back but didn’t posted in Blog.For implementing the Standby Database using RMAN follow
The below steps:

Applies to: Oracle Server - Enterprise Edition - Version: 8.1.7.4 to 11.2.0.1.0
Reference:
http://download.oracle.com/docs/cd/B10501_01/server.920/a96566/rcmstand.htm

Summary of Steps:
Step 1: Backup the database that includes backup of datafiles, archivelogs and controlfile for standby
Step 2: Move the backups to the standby server
Step 3: Make proper changes in the parameter files of both primary and standby database
Step 4: Do the restore and recover on standby database
Step 5: Put the standby database in recover managed mode

As a primary responsibility of DBA ,please make sure you backup controlfile,Datafiles & archivelogs .In the below example we will make use of this backup for creating Standy Database.


Step 1: Backup the database that includes backup of datafiles, archivelogs and controlfile for standby

C:\>rman target /

Recovery Manager: Release 10.2.0.3.0 - Production on Wed Feb 4 12:28:47 2009

Copyright (c) 1982, 2005, Oracle. All rights reserved.

connected to target database: TESTDB (DBID=2606456859)

RMAN> run
2> {
3> allocate channel c1 type disk format ‘\\node1.in.Test.com\TESTDB_Backup\%d_DATA_%U_%T';
4> allocate channel c2 type disk format '\\node1.in.Test.com\TESTDB_Backup\%d_DATA_%U_%T';
5> allocate channel c3 type disk format '\\node1.in.Test.com\TESTDB_Backup\%d_DATA_%U_%T';
6> backup database plus archivelog;
7> }

released channel: ORA_DISK_1
allocated channel: c1
channel c1: sid=615 instance=TESTDB1 devtype =DISK

allocated channel: c2
channel c2: sid=596 instance=TESTDB1 devtype =DISK

allocated channel: c3
channel c3: sid=619 instance=TESTDB1 devtype =DISK


Starting backup at 04-FEB-09
current log archived
channel c1: starting archive log backupset
channel c1: specifying archive log(s) in backup set
input archive log thread=2 sequence=2855 recid=7974 stamp=677037473
input archive log thread=2 sequence=2856 recid=7978 stamp=677070799

…………………………….
…………………………….
…………………………….
…………………………….

channel c3: backup set complete, elapsed time: 00:01:06
Finished backup at 04-FEB-09

Starting backup at 04-FEB-09
channel c1: starting full datafile backupset
channel c1: specifying datafile(s) in backupset
input datafile fno=00004 name=H:\ORADATA\TESTDB\UNDOTBS02.DBF
input datafile fno=00008 name=H:\ORADATA\TESTDB\COMET01.DBF
input datafile fno=00006 name=H:\ORADATA\TESTDB\PHASER01.DBF
input datafile fno=00001 name=H:\ORADATA\TESTDB\SYSTEM01.DBF
input datafile fno=00016 name=H:\ORADATA\TESTDB\HDK_TBS_01.DBF
input datafile fno=00014 name=H:\ORADATA\TESTDB\LCS_TBS_01
input datafile fno=00011 name=H:\ORADATA\TESTDB\COMET04.DBF
channel c1: starting piece 1 at 04-FEB-09
channel c2: starting full datafile backupset
…………………………….
…………………………….
…………………………….
…………………………….
input archive log thread=1 sequence=4872 recid=8154 stamp=677957862
channel c2: starting piece 1 at 04-FEB-09
channel c1: finished piece 1 at 04-FEB-09
piece handle=\\NODE1.IN.TEST.COM\TESTDB_BACKUP\TESTDB_DATA_D1K6HK7D_1_1_20090204 tag=TAG20090204T173748 comment=NONE
channel c1: backup set complete, elapsed time: 00:00:36
channel c2: finished piece 1 at 04-FEB-09
piece handle=\\NODE1.IN.TEST.COM\TESTDB_BACKUP\TESTDB_DATA_D2K6HK7D_1_1_20090204 tag=TAG20090204T173748 comment=NONE
channel c2: backup set complete, elapsed time: 00:00:36
Finished backup at 04-FEB-09

Starting Control File and SPFILE Autobackup at 04-FEB-09
piece handle=\\NODE1.IN.TEST.COM\TESTDB_BACKUP\C-2606456859-20090204-00 comment=NONE
Finished Control File and SPFILE Autobackup at 04-FEB-09
released channel: c1
released channel: c2
released channel: c3

RMAN>
RMAN> run
2> {
3> allocate channel c1 type disk format '\\node1.in.Test.com\TESTDB_Backup\%d_CTRL_%U_%T';
4> backup current controlfile for standby;
5> }

allocated channel: c1
channel c1: sid=615 instance=TESTDB1 devtyTEST=DISK

Starting backup at 04-FEB-09
channel c1: starting full datafile backupset
channel c1: sTESTcifying datafile(s) in backupset
including standby control file in backupset
channel c1: starting piece 1 at 04-FEB-09
channel c1: finished piece 1 at 04-FEB-09
piece handle=\\NODE1.IN.TEST.COM\TESTDB_BACKUP\TESTDB_CTRL_D4K6HOIR_1_1_20090204 tag=TAG20090204T185211 comment=NONE
channel c1: backup set complete, elapsed time: 00:00:08
Finished backup at 04-FEB-09

Starting Control File and SPFILE Autobackup at 04-FEB-09
piece handle=\\NODE1.IN.TEST.COM\TESTDB_BACKUP\C-2606456859-20090204-01 comment=NONE
Finished Control File and SPFILE Autobackup at 04-FEB-09
released channel: c1

RMAN> exit

Step 2: Move the backups to the standby server
+ FTP or SCP the backup pieces.
+ If the backups are on NFS mount then mount the NFS on standby server with the same name as you mounted on primary database.
+ If the backups are on tape device then make sure that you make proper changes on standby server so that you can restore the backups on standby server.

Note 1: NFS configuration is a relatively straightforward process. The processes that need to be running can all start at boot time with a few modifications to your /etc/rc.conf file.
Note 2:Add the entry in /etc/exports file in Linux.Study the below link for details.In solaris same process is followed by specifying the entry in /etc/dfs/dfstab and in Windows server you need to shared the folder by going to the properties.
http://www.freebsd.org/doc/en_US.ISO8859-1/books/handbook/network-nfs.html


Step 3: Make proper changes in the parameter files of both primary and standby database
Add the below parameter in primary database parameter file :
log_archive_dest_2='SERVICE=STANDBY'

Add the below parameters in standby database parameter file :
Create pfile as follows (copy the pfile from primary and do changes in db_unique_name, instance_name, db_file_name_convert, log_file_name_convert and standby_archive_dest.)

db_name = TESTDB
instance_name = TESTcluster
db_files = 1024
db_file_multiblock_read_count = 8
db_block_size = 8192
control_files = F:\ORADATA\TESTDB\STDCONTROL.CTL
sga_max_size = 1288490188
sga_target = 1073741824
log_checkpoint_interval = 10000
log_checkpoint_timeout = 1800
processes = 250
parallel_max_servers = 5
log_archive_format = ARC%S_%R.%T
global_names = true
undo_management = AUTO
undo_tablespace = UNDOTBS1
thread = 1
db_block_size = 8192
remote_login_passwordfile = exclusive
compatible = 10.2.0.3
sort_area_size = 66560
open_cursors = 300
audit_file_dest = C:\oracle10g\product\10.2.0\db_1\admin\TESTDB\ADUMP
background_dump_dest = C:\oracle10g\product\10.2.0\db_1\admin\TESTDB\BDUMP
user_dump_dest = C:\oracle10g\product\10.2.0\db_1\admin\TESTDB\UDUMP
core_dump_dest = C:\oracle10g\product\10.2.0\db_1\admin\TESTDB\CDUMP
LOG_ARCHIVE_DEST_1 = 'LOCATION=F:\oradata\TESTDB\arch'
DB_FILE_NAME_CONVERT = ('H:\ORADATA\TESTDB','F:\ORADATA\TESTDB')
LOG_FILE_NAME_CONVERT = ('I:\ORADATA\TESTDB','F:\oradata\TESTDB', 'J:\ORADATA\TESTDB','F:\oradata\TESTDB')
DB_UNIQUE_NAME = TESTDB
STANDBY_FILE_MANAGEMENT = AUTO
STANDBY_ARCHIVE_DEST ='F:\oradata\TESTDB\arch'


Step 4: Create instance

On windows use following command to create instance
D:\>oradim -NEW TESTcluster -STARTMODE auto -SYSPWD sys

On LINIX or UNIX just set the ORACLE_SID

Step 5: Create password file

Use the following command to create password file
D:\>orapwd file="path of the database folder" password=

Step 6: Do the restore and recover on standby database
Connect to target database and startup using pfile with nomount option.

C:\WINDOWS\system32>set ORACLE_SID=TESTCLUSTER
C:\WINDOWS\system32>rman target sys

Recovery Manager: Release 10.2.0.3.0 - Production on Wed Feb 4 18:54:41 2009

Copyright (c) 1982, 2005, Oracle. All rights reserved.

target database Password:
connected to target database (not started)

RMAN> set dbid=2606456859;

executing command: SET DBID

RMAN> startup nomount;

Oracle instance started

Total System Global Area 1291845632 bytes

Fixed Size 1292276 bytes
Variable Size 494929932 bytes
Database Buffers 788529152 bytes
Redo Buffers 7094272 bytes

RMAN>
RMAN> restore standby controlfile from '\\node1\TESTDB_Backup\TESTDB_CTRL_D4K6HOIR_1_1_20090204';

Starting restore at 04-FEB-09
using target database control file instead of recovery catalog
allocated channel: ORA_DISK_1
channel ORA_DISK_1: sid=267 device type=DISK

channel ORA_DISK_1: restoring control file
channel ORA_DISK_1: restore complete, elapsed time: 00:00:06
output filename=F:\ORADATA\TESTDB\STDCONTROL.CTL
Finished restore at 04-FEB-09

RMAN> sql alter database mount standby database’;

sql statement: alter database mount
released channel: ORA_DISK_1

RMAN> restore database;

Starting restore at 04-FEB-09
allocated channel: ORA_DISK_1
channel ORA_DISK_1: sid=263 device type=DISK

channel ORA_DISK_1: starting datafile backupset restore
channel ORA_DISK_1: sTESTcifying datafile(s) to restore from backup set
restoring datafile 00002 to F:\ORADATA\TESTDB\UNDOTBS01.DBF
restoring datafile 00007 to F:\ORADATA\TESTDB\RMSUSR01.DBF
restoring datafile 00010 to F:\ORADATA\TESTDB\COMET03.DBF
restoring datafile 00013 to F:\ORADATA\TESTDB\SCADA_TBS01.DBF
restoring datafile 00015 to F:\ORADATA\TESTDB\TEST_TRACE01.DBF
restoring datafile 00017 to F:\ORADATA\TESTDB\INDX_PHASE_01.DBF
restoring datafile 00018 to F:\ORADATA\TESTDB\INDX_EDITOR_01.DBF
channel ORA_DISK_1: reading from backup piece \\NODE1.IN.TEST.COM\TESTDB_BACKUP\TESTDB_DATA_CVK6H488_1_1_20090204
channel ORA_DISK_1: restored backup piece 1
piece handle=\\NODE1.IN.TEST.COM\TESTDB_BACKUP\TESTDB_DATA_CVK6H488_1_1_20090204 tag=TAG20090204T130511
channel ORA_DISK_1: restore complete, elapsed time: 00:23:57
channel ORA_DISK_1: starting datafile backupset restore
channel ORA_DISK_1: specifying datafile(s) to restore from backup set
restoring datafile 00003 to F:\ORADATA\TESTDB\SYSAUX01.DBF
restoring datafile 00005 to F:\ORADATA\TESTDB\USERS01.DBF
restoring datafile 00009 to F:\ORADATA\TESTDB\COMET02.DBF
restoring datafile 00012 to F:\ORADATA\TESTDB\EDITOR_TBS01.DBF
restoring datafile 00019 to F:\ORADATA\TESTDB\INDX_COMET_01.DBF
restoring datafile 00020 to F:\ORADATA\TESTDB\AUTOCALPF.DBF
restoring datafile 00021 to F:\ORADATA\TESTDB\AUTOCALPF_INDEX.DBF
channel ORA_DISK_1: reading from backup piece \\NODE1.IN.TEST.COM\TESTDB_BACKUP\TESTDB_DATA_D0K6H488_1_1_20090204
channel ORA_DISK_1: restored backup piece 1
piece handle=\\NODE1.IN.TEST.COM\TESTDB_BACKUP\TESTDB_DATA_D0K6H488_1_1_20090204 tag=TAG20090204T130511
channel ORA_DISK_1: restore complete, elapsed time: 00:28:45
channel ORA_DISK_1: starting datafile backupset restore
channel ORA_DISK_1: specifying datafile(s) to restore from backup set
restoring datafile 00001 to F:\ORADATA\TESTDB\SYSTEM01.DBF
restoring datafile 00004 to F:\ORADATA\TESTDB\UNDOTBS02.DBF
restoring datafile 00006 to F:\ORADATA\TESTDB\PHASER01.DBF
restoring datafile 00008 to F:\ORADATA\TESTDB\COMET01.DBF
restoring datafile 00011 to F:\ORADATA\TESTDB\COMET04.DBF
restoring datafile 00014 to F:\ORADATA\TESTDB\LCS_TBS_01
restoring datafile 00016 to F:\ORADATA\TESTDB\HDK_TBS_01.DBF
channel ORA_DISK_1: reading from backup piece \\NODE1.IN.TEST.COM\TESTDB_BACKUP\TESTDB_DATA_CUK6H488_1_1_20090204
channel ORA_DISK_1: restored backup piece 1
piece handle=\\NODE1.IN.TEST.COM\TESTDB_BACKUP\TESTDB_DATA_CUK6H488_1_1_20090204 tag=TAG20090204T130511
channel ORA_DISK_1: restore complete, elapsed time: 00:37:46
Finished restore at 04-FEB-09

Step 7: Recover till the current SCN

Check the backed up archivelogs and recover standby database till that SCN

RMAN> list backup of archivelog all;
……………………………………………………………
……………………………………………………………
……………………………………………………………
……………………………………………………………

BS Key Size Device Type Elapsed Time Completion Time
------- ---------- ----------- ------------ ---------------
2389 38.81M DISK 00:00:34 04-FEB-09
BP Key: 3706 Status: AVAILABLE Compressed: NO Tag: TAG20090204T173748
Piece Name: \\NODE1.IN.TEST.COM\TESTDB_BACKUP\TESTDB_DATA_D2K6HK7D_1_1_20090204

List of Archived Logs in backup set 2389
Thrd Seq Low SCN Low Time Next SCN Next Time
---- ------- ---------- --------- ---------- ---------
1 4872 220387955 04-FEB-09 220524445 04-FEB-09

BS Key Size Device Type Elapsed Time Completion Time
------- ---------- ----------- ------------ ---------------
2390 46.58M DISK 00:00:35 04-FEB-09
BP Key: 3707 Status: AVAILABLE Compressed: NO Tag: TAG20090204T173748
Piece Name: \\NODE1.IN.TEST.COM\TESTDB_BACKUP\TESTDB_DATA_D1K6HK7D_1_1_20090204

List of Archived Logs in backup set 2390
Thrd Seq Low SCN Low Time Next SCN Next Time
---- ------- ---------- --------- ---------- ---------
2 2907 220387972 04-FEB-09 220524442 04-FEB-09


“it list all the backed up archives”
“check the highest SCN backed up and give till next SCN number for recovery as follows”

RMAN> recover database until sequence 4873;

Starting recover at 05-FEB-09
using channel ORA_DISK_1

starting media recovery

archive log thread 2 sequence 2908 is already on disk as file F:\ORADATA\TESTDB\ARCH\ARC02908_0643721627.002
channel ORA_DISK_1: starting archive log restore to default destination
channel ORA_DISK_1: restoring archive log
archive log thread=1 sequence=4872
channel ORA_DISK_1: reading from backup piece \\NODE1.IN.TEST.COM\TESTDB_BACKUP\TESTDB_DATA_D2K6HK7D_1_1_20090204
ORA-19870: error reading backup piece \\NODE1.IN.TEST.COM\TESTDB_BACKUP\TESTDB_DATA_D2K6HK7D_1_1_20090204
ORA-19505: failed to identify file "\\NODE1.IN.TEST.COM\TESTDB_BACKUP\TESTDB_DATA_D2K6HK7D_1_1_20090204"
ORA-27041: unable to open file
OSD-04002: unable to open file
O/S-Error: (OS 2) The system cannot find the file specified.
failover to previous backup
Oracle Error:
ORA-01547: warning: RECOVER succeeded but OTESTN RESETLOGS would get error below
ORA-01194: file 1 needs more recovery to be consistent
ORA-01110: data file 1: 'F:\ORADATA\TESTDB\SYSTEM01.DBF'

RMAN-00571: ===========================================================
RMAN-00569: =============== ERROR MESSAGE STACK FOLLOWS ===============
RMAN-00571: ===========================================================
RMAN-03002: failure of recover command at 02/05/2009 11:00:30
RMAN-20506: no backup of archivelog found
RMAN-06053: unable to perform media recovery because of missing log
RMAN-06025: no backup of log thread 1 seq 4872 lowscn 220387955 found to restore

RMAN> exit


Note : No need to worry about the errors, you can safely ignore and move to step 7
Oracle Error:
ORA-01547: warning: RECOVER succeeded but OTESTN RESETLOGS would get error below
ORA-01194: file 1 needs more recovery to be consistent
ORA-01110: data file 1: 'F:\ORADATA\TESTDB\SYSTEM01.DBF'


Step 8: Put the standby database in recover managed mode

C:\WINDOWS\system32>sqlplus sys as sysdba

SQL*Plus: Release 10.2.0.3.0 - Production on Thu Feb 5 11:05:21 2009

Copyright (c) 1982, 2006, Oracle. All Rights Reserved.

Enter password:

Connected to:
Oracle Database 10g Enterprise Edition Release 10.2.0.3.0 - Production
With the Partitioning, OLAP and Data Mining options

SQL> alter database recover managed standby database disconnect from session;

Database altered.

Here is your Standby Database ready use it when ever you want to switch the role whenever there is a requirement to do some critical changes in primary or production make your standby as primary and to implement the fast start fail over where something happens to primary than standby will
Automatically become primary.

In my upcoming posts,I will explain few scenarios on failover and switchover cases and useful information for working with Dataguard and Standby Databases.

Hope it helps.


Best regards,

Rafi.
Thursday, March 24, 2011

Upgrading oracle Database from 10.2.0.1.0 to 10.2.0.4.0 on Windows Server


Hi,
I've upgraded the Database 10.2.0.1.0 to 10.2.0.4.0.Below are the steps with screenshots on the right side for our reference.I have downloaded the PATCH SET 10.2.0.4.0 and applying it to my current Database release 10.2.0.1.0.


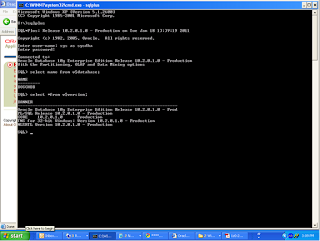
Step 1: I’m doing this upgrade by Checking the version initially (10.2.0.1.0)

SQL>select name from v$database;
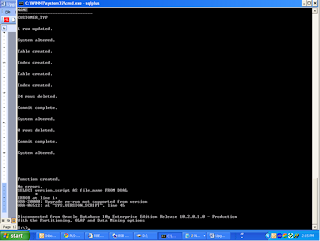
SQL>select *from v$version; =>Database version is 10.2.0.1.0 as seen in screenshot1.


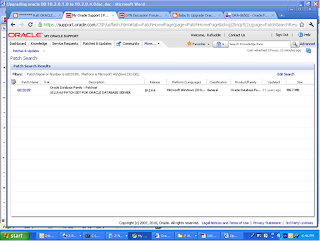
Step 2:Login to you’re MY ORACLE SUPPORT account =>Click on PATCHES & UPDATES for downloading your patch for Windows 32-bit Operating system(which can
Refer in the screenshot1 in step 1)
In PATCHES & UPDATES =>enter patch number 6810189
You can select upto 5 operation systems but to reduce your search select windows
32 bit as you can see in the screenshot2.

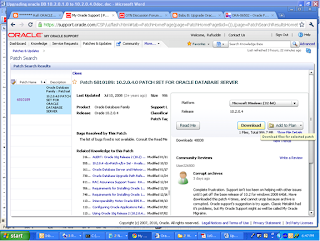
Now,download this patch set .Refer the screenshot 3 for the better overview:

Step 3: Shutdown the oracle Database.

Click on the Read Me tab and save the Read me file so that you can refer this later while doing patch installation.When you are doing this upgrade fro RAC Database the steps may vary which is given in this Read me file.


Step 4: Now download this this patch and copy it to D:\soft 10.4\ path(This can be a place in your ORACLE_HOME Directory or not necessary) But for my reference I copied here.

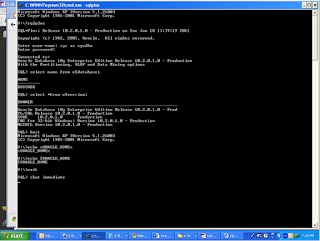
Set the SID and Shutdown the database as given in the screenshot4.


Step 5: Stop all the services now
My service name is BOSCHDB So I will be stopping the services as given below:

D:\Oracle10g>net stop OracleDBConsoleBOSCHDB

The OracleDBConsoleBoschDB service is stopping........
The OracleDBConsoleBoschDB service was stopped successfully.

D:\Oracle10g>net stop OracleServiceBOSCHDB

The OracleServiceBOSCHDB service is stopping.
The OracleServiceBOSCHDB service was stopped successfully.

D:\Oracle10g>lsnrctl stop

Step 6:Backup your database.

As a precaution or Primary responsibility of DBA and also
Oracle recommends that you create a backup of the Oracle 10g installation before you install the patch set.

Step 7:Check Tablespace Sizes and Set Parameter Values if require
Review the following sections before upgrading a database.

Step 8:Now Launch your setup by going to the path where this patch is copied

cd D:\soft 10.4\Disk1
d:
D:\soft 10.4\Disk1>setup.exe

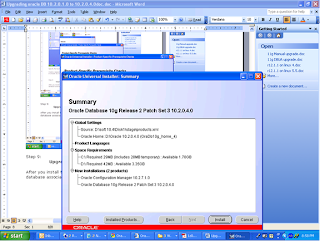
Specify the location of your Oracle home by Browse:

Create a separate folder (Directory) as below:
D:\Oracle 10.2.0.4.0

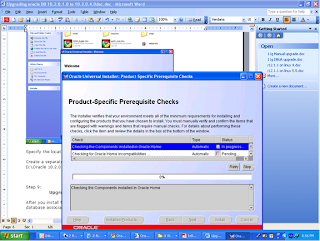
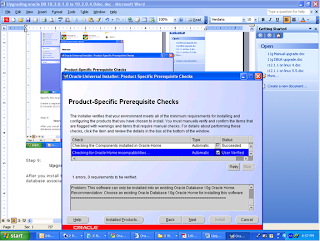
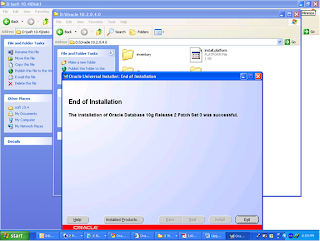
I was happy to see this screen where I have to click install

Step9: Upgrade the Database

After you install the patch set, you must perform the following steps on every database associated with the upgraded Oracle home:

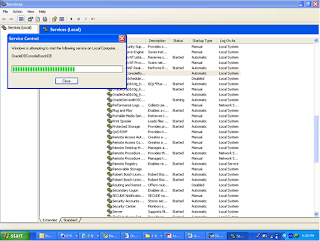
Start all services
Go to Control panel=>Administrative tools =>Services=>Start all oracle services as given below or In Start=>run=>services.msc


Step 10: Upgrade your dictionary

SQL> SPOOL patch.log
SQL>@D:\Oracle10g\RDBMS\ADMIN\catupgrd.sql
SQL> SPOOL. off

This script provides a direct upgrade path from these releases to the new Oracle release.

Note 1: For running catupgrd.sql you have to start your Database by using
STARTUP UPGRDADE command.
Note 2:Catupgrd.sql script should be run by going into the above path of ORACLE_HOME/rdbms/admin

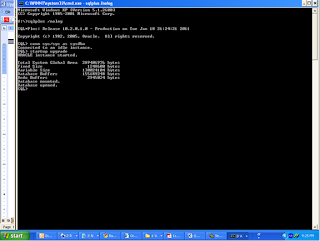
Once this script is executed successfully you will see the screen as given below

Step 11:Bounce(restart) your Database for changes to take effect:

SQL> SHUTDOWN
SQL> STARTUP

Step 12: Compile Invalid Objects & Verify our
Database version.

Run the utlrp.sql script to recompile all invalid PL/SQL packages.

SQL> @ D:\Oracle10g\RDBMS\ADMIN\utlrp.sql

SQL> select * from v$version;

BANNER
----------------------------------------------------------------
Oracle Database 10g Enterprise Edition Release 10.2.0.4.0 - Prod
PL/SQL Release 10.2.0.4.0 - Production
CORE 10.2.0.4.0 Production
TNS for 32-bit Windows: Version 10.2.0.4.0 - Production
NLSRTL Version 10.2.0.4.0 - Production

Hope it helps.


Best regards,

Rafi.

Tuesday, March 22, 2011

Installation of Oracle 11g release2 software,Database creation on Windows 32-bit and Useful new features


Hi,
This post might be simpler but I will try to put some useful details which can help a beginner's or DBA's to understand oracle11g release2 installation,Database creation and useful feature of this excellent Database.

Step1:Download the Oracle11g release2 software & Unzip it.
We can download the Oracle11g release2 software from OTN(If you are not having OTN(Oracle technology network) account please create one).Download the software from the below link:

http://www.oracle.com/technetwork/database/enterprise-edition/downloads/index.html

Note:You need around 4.5 Gb of space to download these software in your machine,so please make sure you have enough space.The software will be in zip format.Unzip in your machine where around 4.5 GB of space is available.

Step2:Create Directories for your Installation with useful naming conventions
We can create two directories atleast 1)Oracle11g release2 Home:Oracle11g_home =>Where all the binaries,admin files are present and 2)Oracle11g release2 Database files directory:Oracle11g_DB=>Here you can put your Database files and Tablespaces.In this article:

D:\Oracle11g_home=>Oracle11g release2 Home.
D:\Oracle11gDB=>Oracle11g Database files.


Step3: Start your Oracle11g release2 installation

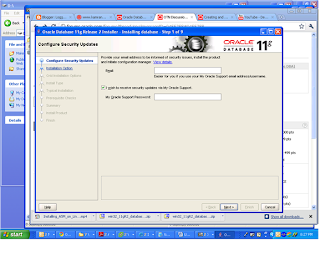
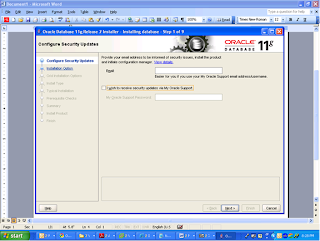
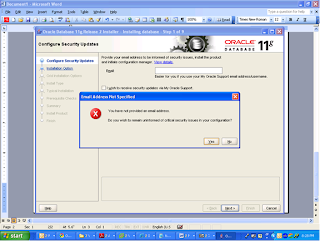
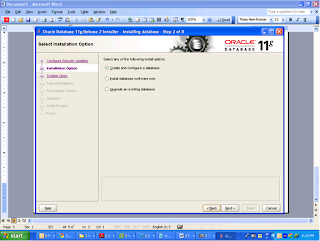
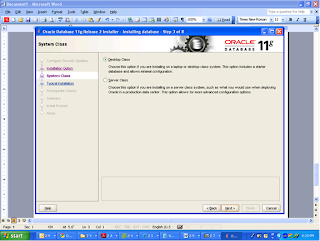
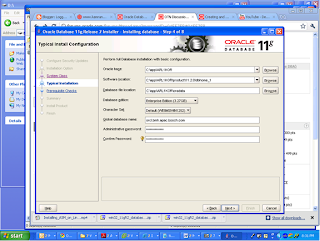
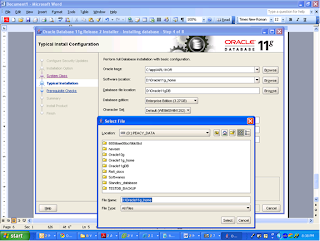
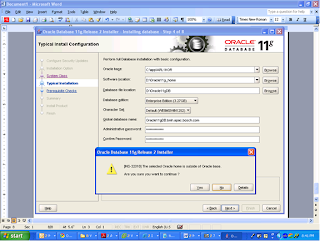
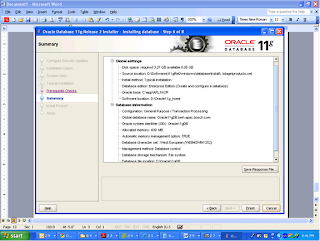
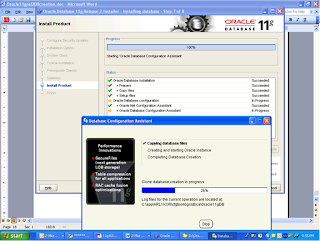
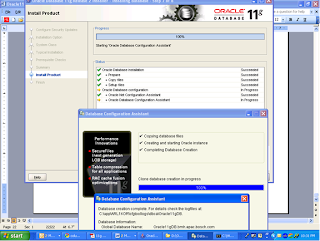
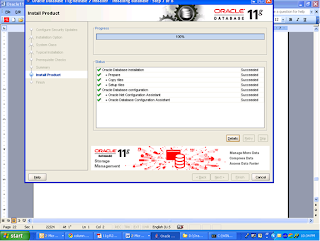
Click the 11gSetup and start your installation.The installation will proceed as mentioned in the diagrams.
Specify the Oracle11g release2 home path,Make sure you have around 4 GB of free space in the Drive where you are keeping the home
Specify the Oracle11g releases2 Database files here all your Datafiles,logfile,parameter files and Tablespace will be present.

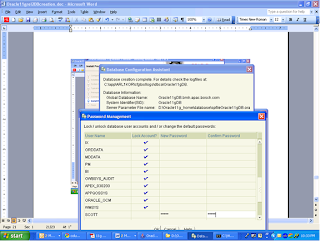
Step4::Choose password management page to unlock some users like scott,hr and specify the suitable password

Step5:Verify your installation as follows.

SQL> select name from v$database;

NAME
---------
ORACLE11

SQL> select status from v$instance;

STATUS
------------
OPEN

SQL> select *from v$version;

BANNER
--------------------------------------------------
Oracle Database 11g Enterprise Edition Release 11.
2.0.1.0 - Production

PL/SQL Release 11.2.0.1.0 - Production
CORE 11.2.0.1.0 Production
TNS for 32-bit Windows: Version 11.2.0.1.0 - Produ
ction

NLSRTL Version 11.2.0.1.0 - Production

Component installed:
---------------------
SQL> select comp_id||' '||comp_name||' '||version from dba_registry;

COMP_ID||''||COMP_NAME||''||VERSION
--------------------------------------------------
OWB OWB 11.2.0.1.0
APEX Oracle Application Express 3.2.1.00.10
EM Oracle Enterprise Manager 11.2.0.1.0
AMD OLAP Catalog 11.2.0.1.0
SDO Spatial 11.2.0.1.0
ORDIM Oracle Multimedia 11.2.0.1.0
XDB Oracle XML Database 11.2.0.1.0
CONTEXT Oracle Text 11.2.0.1.0
EXF Oracle Expression Filter 11.2.0.1.0
RUL Oracle Rules Manager 11.2.0.1.0
OWM Oracle Workspace Manager 11.2.0.1.0

COMP_ID||''||COMP_NAME||''||VERSION
--------------------------------------------------
CATALOG Oracle Database Catalog Views 11.2.0.1.0
CATPROC Oracle Database Packages and Types 11.2.0.
1.0

JAVAVM JServer JAVA Virtual Machine 11.2.0.1.0
XML Oracle XDK 11.2.0.1.0
CATJAVA Oracle Database Java Packages 11.2.0.1.0
APS OLAP Analytic Workspace 11.2.0.1.0
XOQ Oracle OLAP API 11.2.0.1.0

18 rows selected.

Datafiles:
------------
SQL> select name from v$datafile;

NAME
--------------------------------------------------
D:\ORACLE11GDB\ORACLE11GDB\SYSTEM01.DBF
D:\ORACLE11GDB\ORACLE11GDB\SYSAUX01.DBF
D:\ORACLE11GDB\ORACLE11GDB\UNDOTBS01.DBF
D:\ORACLE11GDB\ORACLE11GDB\USERS01.DBF
D:\ORACLE11GDB\ORACLE11GDB\EXAMPLE01.DBF

Multiplexed controlfiles:
------------------------
SQL> select name from v$controlfile;

NAME
--------------------------------------------------
D:\ORACLE11GDB\ORACLE11GDB\CONTROL01.CTL
C:\APP\ARL1KOR\FLASH_RECOVERY_AREA\ORACLE11GDB\CON
TROL02.CTL

Redolog files:
--------------
SQL> select group#,member from v$logfile;

GROUP#
----------
MEMBER
--------------------------------------------------
3
D:\ORACLE11GDB\ORACLE11GDB\REDO03.LOG

2
D:\ORACLE11GDB\ORACLE11GDB\REDO02.LOG

1
D:\ORACLE11GDB\ORACLE11GDB\REDO01.LOG


Diagnostic dump dest:
---------------------

SQL> sho parameter %DIAG%

NAME TYPE VALUE
------------------------------------ ----------- ------------------------------
diagnostic_dest string C:\APP\ARL1KOR
SQL> sho parameter %USER%

NAME TYPE VALUE
------------------------------------ ----------- ------------------------------
license_max_users integer 0
parallel_adaptive_multi_user boolean TRUE
redo_transport_user string
user_dump_dest string c:\app\arl1kor\diag\rdbms\orac
le11gdb\oracle11gdb\trace
SQL> sho parameter %AUDIT%

NAME TYPE VALUE
------------------------------------ ----------- ------------------------------
audit_file_dest string C:\APP\ARL1KOR\ADMIN\ORACLE11G
DB\ADUMP
audit_sys_operations boolean FALSE
audit_trail string DB
SQL> sho parameter %CORE%

NAME TYPE VALUE
------------------------------------ ----------- ------------------------------
background_core_dump string partial
core_dump_dest string c:\app\arl1kor\diag\rdbms\orac
le11gdb\oracle11gdb\cdump
shadow_core_dump string none
SQL> sho parameter %BACK%

NAME TYPE VALUE
------------------------------------ ----------- ------------------------------
background_core_dump string partial
background_dump_dest string c:\app\arl1kor\diag\rdbms\orac
le11gdb\oracle11gdb\trace
backup_tape_io_slaves boolean FALSE
db_flashback_retention_target integer 1440
fast_start_parallel_rollback string LOW
rollback_segments string
transactions_per_rollback_segment integer 5

In the upcoming posts,I will posts the issues that can occur while using this releases or when you migrate from Oracle9i,10g to Oracle11g release2.Hope it helps.


Best regards,

Rafi.

Friday, March 18, 2011

Resolving ORA-39083,USER DEFINED TYPE FAILED WHILE IMPORT TO THE SAME DATABASE :

Hi,
We days back when I checked my log file after doing import,I have seen error
ORA-39083,after doing some research I resolved this error as given below,This error
can occur while using imp utility or impdp utility,I have mentioned the possible resolution for both the cases.

Issue:
User defined data type failed to create, when an import is performed to the same database (source and destination same)

Error:
ORA-39083: Object type TYPE failed to create with error:
ORA-02304: invalid object identifier literal

Cause:-
OID of the user defined type already exists.

Resolution:

1) With import utility:-
Use the parameter - “toid_novalidate”

2) With impdp Utility
Use the parameter - “TRANSFORM=oid:n”
Test case:-

1) Import utility:
---------------------

imp system fromuser=prod touser=dev log=test.log ignore=y file=exp.dmp toid_novalidate=dev.T_MERGE_KEY_COLUMN,dev.T_MERGE_CONFIGURATION,dev.T_MERGE_KEY_COLUMN_LIST,dev.T_MERGE_CONFIGURATION_LIST

Where the following are the tables, which contains user defined datatype.

dev.T_MERGE_KEY_COLUMN,
dev.T_MERGE_CONFIGURATION,
dev.T_MERGE_KEY_COLUMN_LIST,
dev.T_MERGE_CONFIGURATION_LIST

Import details shows as follows:-

Export file created by EXPORT:V09.02.00 via conventional path
import done in US7ASCII character set and UTF8 NCHAR character set
import server uses UTF8 character set (possible charset conversion)
. importing PROD's objects into DEV
. . skipping TOID validation on type DEV.T_MERGE_KEY_COLUMN
. . skipping TOID validation on type DEV.T_MERGE_KEY_COLUMN_LIST
. . skipping TOID validation on type DEV.T_MERGE_CONFIGURATION
. . skipping TOID validation on type DEV.T_MERGE_CONFIGURATION_LIST
. . importing table "CFG_ETL_MERGE_PROCESS" 62 rows imported
. . importing table "MERGE_PROCESS_CONFIGURATION" 1116 rows imported
. . importing table "MERGE_PROCESS_KEY_COLUMN" 66 rows imported
About to enable constraints...
Import terminated successfully without warnings.


2)Impdp Utility:
-----------------

impdp emptest/pwd REMAP_SCHEMA=emptest:emphp TRANSFORM=oid:n DIRECTORY=IMP_DP_EMPTEST NETWORK_LINK=emptest LOGFILE=emptestdata5_29122010.log

Here we used network impdp, we can use this for Normal impdp as well.

Note: The parameter TRANSFORM=oid:n is useful only in Oracle 10g rel2.

Hope it helps.


Best regards,

Rafi.
Monday, March 14, 2011

R12 Applications File System


Hi,
Few days back I have posted about the 3-tiers 1)Destop 2)Application 3)Database,
I'm continuing with R12 application filesystem in this post.


II)Applications File System– Overview

The Top-Level R12-Applications Directory Structure is divided into 3 parts:
1)Database Server files
2)Instant specific files
3)Application tier Server


1)Database Server files(db):

• The db/apps_st/data directory is located on the database node machine, and contains the system tablespaces, redo log files, data tablespaces, index tablespaces,and database files
• The db/tech_st/10.2.0 directory is located on the database node machine, and contains the ORACLE_HOME for the Oracle10g database
• The apps/apps_st/appl (APPL_TOP) directory contains the product directories and
files for Oracle Applications.
• The apps/apps_st/comn (COMMON_TOP) directory contains Java classes, HTML
pages, and other files and directories used by multiple products
• The apps/tech_st/10.1.2 directory contains the ORACLE_HOME used for the
Applications technology stack tools components.
• The apps/tech_st/10.1.3 directory contains the ORACLE_HOME used for the
Applications technology stack Java components.

2)Instant specific files(inst):
Instance Home (INST_TOP):


*Oracle Applications Release 12 introduces the concept of a top-level directory for an Applications instance. This directory is referred to as the Instance Home, and denoted by the environment variable $INST_TOP.
*Using an Instance Home provides the ability to share Applications and technology.

Notable features of this architecture include:

• The latest version of Oracle Containers for Java (OC4J), the successor to JServ, is
included in Oracle Application Server 10.1.3.
• All major services are started out of the OracleAS 10.1.3 ORACLE_HOME.
• The Applications modules (packaged in the file formsapp.ear) are deployed into the
OC4J-Forms instance running out of the OracleAS 10.1.3 ORACLE_HOME, while the frmweb executable is invoked out of the OracleAS 10.1.2 ORACLE_HOME.
*stack code among multiple instances, for example a development instance and a test instance.
*Support for read-only file systems and centralization of log files.

3)Application tier Server files(apps):
ORACLE_HOMEs:

There are 3 ORACLE_HOMEs in the Architecture of R12:
One ORACLE Database 10g rel2( Oracle 10.2.0 Home) &
Two ORACLE Application Server(OracleAS Homes)

*Use of Two Oracle Application Server ORACLE_HOMEs in Release 12
Two different Oracle Application Server (OracleAS) 10g releases, in separate ORACLE_HOMEs, are used in Oracle Applications Release 12.
*This enables Oracle Applications to take advantage of the latest Oracle technologies.
• The Oracle Application Server 10.1.3 ORACLE_HOME (sometimes referred to as
the Web or Java ORACLE_HOME) replaces the 8.1.7-based ORACLE_HOME
provided by Oracle9i Application Server 1.0.2.2.2 in Release 11i).


Hope it helps in understanding Oracle R12 Application filesystem.


Best regards,

Rafi.

Migrating Oracle Database from Windows vmware server to Linux vmware server

Hi,
I have migrated Oracle 10g Database running on Windows vmware server to Oracle 11g Database on linux vmware server.It was great learning experience with lot of mistakes,ofcourse mistakes are the building block for learning.Here I'm explaining the
steps which I have followed and the steps which we should follow to do migration task
successfully.Plan for each of the below steps so that you can complete your task on time.

Step 1: Installing RHEL 5.4(64 bit) on empty vmware machine.
-------

Vmware machine you can create by following the below link:

http://www.vmware.com/support/ws55/doc/ws_newguest_setup_simple_steps.html

I just go with the default installation steps,This we should not do,Please prepare the plan of each and every thing,starting from OS installation to Verifying the data after migration and make word document for easy reference..

Installation of Linux should be done with proper planning about the below things:
1)Space we need to give for /(root) mount point. (Recomended 2 GB ).
2)Space we need to give for software location path,where our Oracle Database resides.This mount point name we can give name like /u01 (Recommended 5 GB for Oracle11g)
3)Space we need to give for Database files,where all Datafiles,Redolog files,control file will resides,This is mainly dependent on your Database size.This mount point name we can give name like /u02 .We are planning to give 30 GB in future for this particular mount point.
4)Space we need to give for Archives logs,Where Oracle Database Archive logs can be present so that for recovery of Database,Whenever datafiles are corrupted we can make use of archive logs and do 100% recovery.This mount point name we can give /u03.

Starting Linux installation:
For accessing or managing multiple vmware machine install vsphere client.I have installed vsphere client version 4.0.0.For downloading vsphere client use the below link:

http://vmware-vsphere-client.software.informer.com/4.0/

On vmware machine Right click and open console and click on CD icon to istall from the DVD/CD of RHEL 5.4 by default it is pointed to E: Drive for DVD on your machine. While installing Linux(RHEL 5.4) please make sure you customise the options and do proper installtion,By setting proper ip address,Choosing the mount points as mentioned above based upon your requirement.Please try to install all the rpms(Red hat packages) while doing installation itself by customize option in order to avoid later problems.Please make sure firewall is disabled so that you can connect
from other machine or do file transfer.Current IP address,subnet mask you should ask
all the network details from your system admin for smooth flow of installation.Make sure Secure linux feature should also be disable to avoid some issues.

Below is the link you can refer while doing RHEL 5.4(Linux installation):

http://builddocs.com/server_os_builds/installing-redhat-5-4-64-bit/


Step 2: Verify the Installation.
------


[root@node2 ~]# cat /etc/redhat-release ->for checking the RHEL version installed
Red Hat Enterprise Linux Server release 5.4 (Tikanga)
You have new mail in /var/spool/mail/root

Check the network:
------------------
Make sure the ipaddress is correct otherwise change the ip-address.

[root@node2 ~]# ifconfig -a
eth0 Link encap:Ethernet HWaddr 00:50:56:A5:16:DD
inet addr:10.47.33.208 Bcast:10.47.35.255 Mask:255.255.252.0
inet6 addr: fe80::250:56ff:fea5:16dd/64 Scope:Link
UP BROADCAST RUNNING MULTICAST MTU:1500 Metric:1
RX packets:2723271 errors:0 dropped:0 overruns:0 frame:0

Make sure the mount points,IP address and other OS related details are correct.

Below are some troubleshooting steps :

Network related troubleshooting:

Setting up a Static IP address:

Method 1:Command line

Login as 'root' user.
Change your Direcotory to:
#cd /etc/sysconfig/network-scripts/
#ls
You will find the configuration file by name ifcfg-eth0
#vi ifcfg-eth0

We have to set parameters given by network/system admin.

# Intel Corporation 82545EM Gigabit Ethernet Controller (Copper)
DEVICE=eth0
BOOTPROTO=none
HWADDR=00:50:56:A5:16:DD
ONBOOT=yes
DHCP_HOSTNAME=Hostname.abc.com
TYPE=Ethernet
USERCTL=no
IPV6INIT=no
PEERDNS=yes
IPADDR=10.47.33.108
NETMASK=255.255.252.0
GATEWAY=10.47.32.1

Save the configuration file.

For network reboot.
From root user
#service network stop
#service network start
OR
#ifdown etho
#ifup etho0

Method 2:Go to the Vmware server directly where linux is installed.

Right Click on the Vmware server and click open console
Go to system=>administration=>network
Click the DNS specify the
Hostname:node2.server.com
Primary DNS:10.47.33.108
Secondary DNS:192.168.1.110
DNS path:in.domain.com

Save the changes
Click on the eth0 to make it active.
Make sure eth0 is active.

Step 3:Perform the prerequisite before launcing the Software
------

a)Create groups & Oracle software installation user Oracle :
su - root
#groupadd dba => group of users to be granted SYSDBA system privilege
#groupadd oinstall => group owner of Oracle files
#useradd -m -c -g oinstall -G dba oracle
passwd oracle

(OR)
If we have the vmware server access where linux OS is installed
Go to system=>Administration=>Users and Groups ->for create groups and user directly and assigning them permission

b)Setting Shell Limits for the Oracle User:

vi /etc/security/limits.conf

# - nofile - max number of open files
# - rss - max resident set size (KB)
# - stack - max stack size (KB)
# - cpu - max CPU time (MIN)
# - nproc - max number of processes
# - as - address space limit
# - maxlogins - max number of logins for this user
# - maxsyslogins - max number of logins on the system
# - priority - the priority to run user process with
# - locks - max number of file locks the user can hold
# - sigpending - max number of pending signals
# - msgqueue - max memory used by POSIX message queues (bytes)
# - nice - max nice priority allowed to raise to
# - rtprio - max realtime priority
#
#
#

#* soft core 0
#* hard rss 10000
#@student hard nproc 20
#@faculty soft nproc 20
#@faculty hard nproc 50
#ftp hard nproc 0
#@student - maxlogins 4
hard nofile 65536
soft nofile 65536
# End of file
oracle hard nofile 65536
oracle soft nofile 4096
oracle hard nproc 16384
oracle soft nproc 2047

:wq =>save and quit

To see all the settings:
# ulimit -a
core file size (blocks, -c) 0
data seg size (kbytes, -d) unlimited
scheduling priority (-e) 0
file size (blocks, -f) unlimited
pending signals (-i) 24576
max locked memory (kbytes, -l) 32
max memory size (kbytes, -m) unlimited
open files (-n) 1024
pipe size (512 bytes, -p) 8
POSIX message queues (bytes, -q) 819200
real-time priority (-r) 0
stack size (kbytes, -s) 10240
cpu time (seconds, -t) unlimited
max user processes (-u) 24576
virtual memory (kbytes, -v) unlimited
file locks (-x) unlimited

c)Creating Oracle Directories and giving permissions.

Create the directory for $ORACLE_BASE(u01/app/oracle):
su - root
mkdir -p /u01/app/oracle
chown -R oracle.oinstall /u01

Step 4:Download the oracle11g Software from the OTN (Oracle technoloy network) site from the below mentioned link.I downloaded 11g rel2 software for linux 64 bit.

http://www.oracle.com/technetwork/database/enterprise-edition/downloads/index.html

Copy this software to the your OS location by using WinSCP or ftp.I used WinSCP.
Once you copied this to any mounted location /u01.Unzip the software using 'unzip' command.

Step 5:Install the Oracle11g Software and set the environment
------

Go to the runInstaller path and launch the Installation.
$./runInstaller


- Welcome Screen:
- Basic Installation: Checked it which is the default
- Oracle Home Location: Use default:/u01/app/oracle/product/11.2.0/Db_1
- Installation Type: I used the default: Enterprise Edition
- Global Database Name: TESTDB
- Database password: Type in the password for SYS, SYSTEM .

-Click next

If find some rpms missing,Download the rpms as they are open source and execute them in your operating system from root user
I had to install the following RPMs and dependencies to meet the above software requirements

To install:
#rpm -Uvh libaio-devel-0.3.106-32
#rpm -Uvh unixODBC-2.2.11 -32
#rpm -Uvh glibc-devel-2.3.4-23.i686.rpm

To verify this rpm already present
#rpm -qa liba*
or
#rpm -qa unix*
or
#rpm -qa
Once the Software is installed and Database is created with DBCA perform the below steps of Setting Oracle Environments:
Login as Oracle user
$bash
echo $SHELL
/bin/bash
[oracle@node1~]$ pwd
/home/oracle
vi .bash_profile
# .bash_profile

# Get the aliases and functions
if [ -f ~/.bashrc ]; then
. ~/.bashrc
fi

# User specific environment and startup programs

PATH=$PATH:$HOME/bin

export PATH
export ORACLE_BASE=/u01/oracle11g
export ORACLE_HOME=$ORACLE_BASE/product/11.2.0/dbhome_1
export PATH=$ORACLE_HOME/bin:$PATH
export LD_LIBRARY_PATH=$ORACLE_HOME/lib
export ORACLE_SID=TESTDB

:wq => save and quit
Run the profile file:
#. .bash_profile
Note: Once you save this run the .bashprofile file to set the environment variable one time later on in linux OS it will run automatically,xo you can direct connect to Database using SQL*plus.

Step 6: Exporting the Data from the Source 10g Database.
------

I have to migrate 3 users data from Oracle 10g rel2 Database(on Windows VM server) to Oracle 11g rel2(on Linux VM server).I used expdp (Datapump export)

Use system user or create user with suitable privilege for doing

SQL> conn /as sysdba
Connected.
SQL> create user exportuser identified by exportuser;

User created.

SQL> grant connect,resource,exp_full_database,imp_full_database to exportuser;

Grant succeeded.

SQL> create directory expdbtestdir as 'D:\Rafi_docs';

Directory created.


SQL> grant read,write on directory expdbtestdir to exportuser;

Grant succeeded.

SQL> set linesize 121
SQL> col owner format a15
SQL> col directory_name format a20
SQL> col directory_path format a70
SQL> select *from DBA_DIRECTORIES;

OWNER DIRECTORY_NAME DIRECTORY_PATH
--------------- -------------------- ----------------------------------------------------------------------
SYS EXPDBTESTDIR D:\Rafi_docs
SYS SUBDIR D:\Oracle10g\demo\schema\order_entry\/2002/Sep
SYS XMLDIR D:\Oracle10g\demo\schema\order_entry\
SYS MEDIA_DIR D:\Oracle10g\demo\schema\product_media\

Create the .par(Parameter file) for windows server
Testusers_expdp_TESTDB_10Mar2011.par:

This .par file is our parameter file which is use by .bat file for windows server.

-- Testusers_expdp_TESTDB_10Mar2011.par
DIRECTORY=expdbtestdir
DUMPFILE=Testusers_expdp_TESTDB_10Mar2011.dmp
LOGFILE=Testusers_expdp_TESTDB_10Mar2011.log
SCHEMAS=TEST1,TEST2,TEST3
EXCLUDE=STATISTICS
CONTENT=ALL
JOB_NAME=testuser_Expdp_Testdb_01

Create the .bat(batch file) for windows server:

Userstest_backup_script.bat

set ORACLE_SID=TESTDB
set ORACLE_HOME=C:\oracle\product\10.2.0\db_1
set PATH=C:\oracle\product\10.2.0\db_1\bin;%path%
set NLS_LANG=AMERICAN_AMERICA.WE8MSWIN1252
expdp "'exportuser/exportuser'" parfile=E:\oracle10g\oradata\backup_scripts\export\plas_expdp_ebsora.par

For executing just double click the batch file.

Verify the logfile after installation.Check for any errors or warnings.

Step 7: Importing the Data to the Target 11g Database(On linux Vmware server) and validating the data.

Use the impdp utility for importing the 3 test users data.Copy the dumpfile from windows server to linux server by using winscp utility.

Note:Download winscp and install in your Windows Server or Windows Desktop.Winscp is a graphical utility for copying files from windows to linux.

SQL> create user importuser identified by importuser;

User created.

SQL> grant connect,resource,exp_full_database,imp_full_database to importuser;

Grant succeeded.

SQL> create directory impdbtestdir as '\u02\IMPDPTEST';

Directory created.

SQL> grant read,write on directory impdbtestdir to importuser;

Grant succeeded.

SQL> set linesize 121
SQL> col owner format a15
SQL> col directory_name format a20
SQL> col directory_path format a70
SQL> select *from DBA_DIRECTORIES;

OWNER DIRECTORY_NAME DIRECTORY_PATH
--------------- -------------------- ----------------------------------------------------------------------
SYS IMPDBTESTDIR \u02\IMPDPTEST


Note: Make sure you copy the export dump file in the location from where you are running impdp
In the above case '\u02\IMPDPTEST'. i.e Testusers_expdp_TESTDB_10Mar2011.dmp is copied in '\u02\IMPDPTEST' path in linux Vmware server where Oracle11g Database is up and running created with DBCA or using any manual script.

[oracle@host2 u02]$vi impdptest.sh
impdp importuser/importuser DIRECTORY=IMPDBTESTDIR DUMPFILE=Testuser_Mar_2011.dmp
SCHEMAS=TEST1,TEST2,TEST3 LOGFILE=Testuser_Mar10_2011.log

:wq =>save and quit

For executing in linux(unix environment) we use nohup command to run without any intervention.Use & to run in backgroud.

[oracle@host2 u02]$nohup sh impdptest.sh>a.out &

For checking this impdp job is running or not:
[oracle@host2 u02]$ps -eaf|grep impdp

For checking the running logs in linux(unix environment):
[oracle@host2 u02]$tail -f Testuser_Mar10_2011.log

It took around 1 hour since I was importing around 15 GB data.Once the import job is completed,verify the import log file for any errors or warnings.

Validating the Data:
--------------------
Once the import is done successfully verify the object imported.Compare the Source and Target Databases:

Source Database(Oracle 10g rel2):
----------------
SQL> select count(*) from dba_objects where owner like '%TEST%';

COUNT(*)
----------
80

Target Database(Oracle 11g rel2):
----------------
SQL> select count(*) from dba_objects where owner like '%TEST%';

COUNT(*)
----------
80

Check for the invalid objects in Target Database side:
--------------------------------
SQL> select owner||' '||object_name||' '||status from dba_objects
2 where STATUS='INVALID';

OWNER||''||OBJECT_NAME||''||STATUS
----------------------------------------------------------------------------------------
---
PUBLIC DBA_HIST_FILESTATXS INVALID
PUBLIC DBA_HIST_SQLSTAT INVALID

Compile the invalid object using the below script:
-------------------------------------------------

SQL> @$ORACLE_HOME/rdbms/admin/utlrp.sql

SQL> select owner||' '||object_name||' '||status from dba_objects
2 where STATUS='INVALID';

no rows selected
Once you make sure there are no invalid objects,inform the Team about the successful completion of Migration from Oracle 10g to Oracle 11g Database.Ofcourse you might get many issues or change in your applications when you do migration of Database,This issues and possible solution I will be posting in separate post.

Hope it helps.


Best regards,

Rafi.
Monday, March 7, 2011

ITIL v3 Preparation

Hi,
Few days back I've completed my ITIL v3 foundation certification successfully.It was really nice to know about ITIL,which stands for Information technology Infrastructure library.I came to know about different versions of ITIL while studying for ITIL like v1,v2,v3 and the difference between them.It is very interesting.


Basic understanding:
The Information Technology Infrastructure Library (ITIL) mainly deals with services,is a set of concepts and practices for Information Technology Services Management (ITSM), Information Technology (IT) development and IT operations.In one sentence it tells you to manage IT in best way.


Difference between ITIL v2 and ITIL v3:
-------------------------------------------------


1)ITIL v2 deals with 11 books which mainly talk about managing IT.
Where as ITIL v3 deals with 11 books + Event management +Security Management.
2)In ITIL v2,the concept of a service catalog was mentioned, but no process was outlined for its creation or maintenance,nor was the distinction made between a business catalog and a technical catalog.


Understanding ITIL:
------------------

Understanding the concepts of business and merging it with technology is the basic funda I found in ITIL,so we have to compare daily business activities to know more about ITIL.

Example: How to start the hotel and manage to get the maximum profit and customers.It is believed that customer is the king.

Preparation:
-------------

From Exam point of view ITIL v3 user guides,reading sample questions and understanding British English can help you clear your exam.Below are few links:

http://www.itilv3.net/
http://itildumps.blogspot.com/

Hope it helps.


Best regards,

Rafi.